 d
d
Main Cake Page - Orc Head Tutorial - Shelob Tutorial - Gummy Tutorial - Gallery - Books - Links
Disclaimer: The Discworld and all of its portions are the copyright of Terry Pratchett. Permission was not sought to construct this cake, nor to publish these pictures. This is a fan endeavour only, and was not done for monetary gain. L-Space has been informed about this page, as has Colin Smythe Ltd. Publishers. Mr. Smythe said he has no problems with the page, and doesn't think Mr. Pratchett will either.
This was a cake made for my husband Corran, since we're both fans of the Terry Pratchett Discworld books. Below is a step-by-step account of how the cake was made. Please understand that I'm pretty familiar with sugarcraft; this is not a cake for beginners. If you don't know how to handle sugarpaste or are unfamiliar with how to paint with gel colours, don't attempt to make this cake.
If you do decide to make this cake, here's a list of what you'll need:
And yes, I know my head is casting a shadow in most pictures, but I'm a crafter, not a photographer. Click on the pictures to see a bigger version of them.
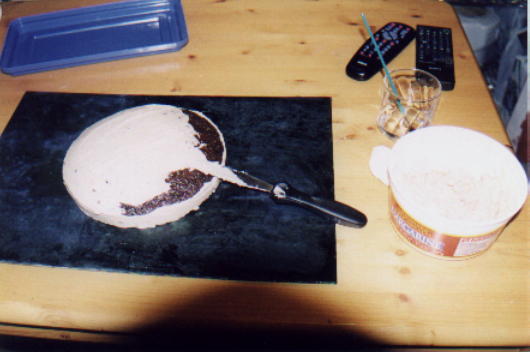
The cake started with a standard mix in two 8" round pans.
|
Painting the Cake BoardI used black gel colouring (with dabs of water added for flow) to paint the board. I used a random, messy, circular motion because it was supposed to look like a space background, not flat black. After covering the board in colour, I dabbed at the wet spots with a wadded up tissue, much as would be done in the "ragging" method of interior painting. This gave the board a more random look. |
|
Placing Lower LayerI then placed the lower layer and covered it with buttercream. |
|
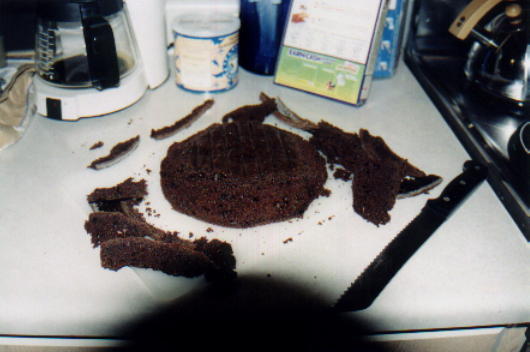
Carving the Upper LayerI carved the upper layer into a dome shape. |
|
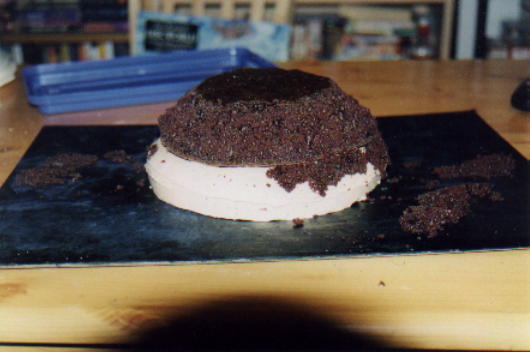
Placing the Upper LayerI gently placed the upper layer on the lower layer. I used some of the cutoffs to fill in gaps around the separation of the layers. |
|
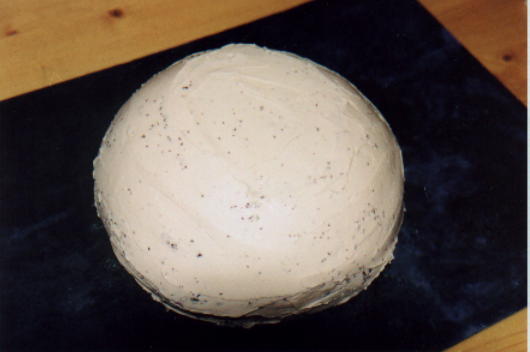
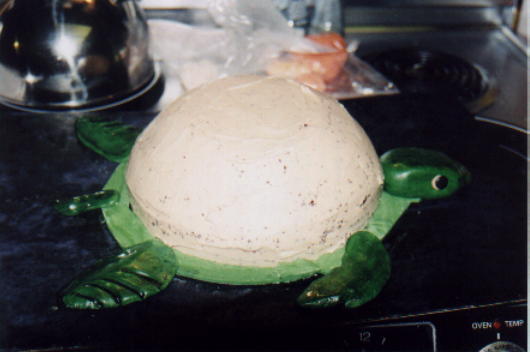
Buttercreaming the Whole CakeThen I covered the whole thing in buttercream, taking care not to pull out the cutoffs when doing so. Where crumbs or bits did come out, I used more buttercream to glue them down. |
|
A'Tuin's HeadFirst, I placed a small amount of green sugarpaste around the base of the cake to act as the lower half of the shell. To make A'Tuin's head, I shaped a piece of medium-dark green sugarpaste into a wedge, then indented the sides for eye cavities. I made small circles from orange sugarpaste and black sugarpaste, and assembled them into eyes. For the nostrils, I poked the end of the paintbrush into the front, then painted in black gel colour. |
|
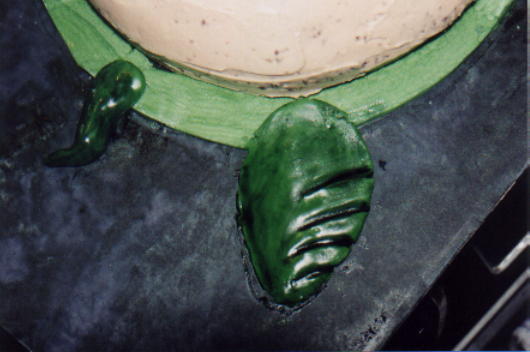
A'Tuin's Fins and TailFor the fins, I made a leaf-like shape out of the same medium-green sugarpaste used for the head, and about the same size as the head. I then pulled it out a bit and added wavy indentations for the rear fins, and made a thumb of sorts for the forward fins. I painted each fin lightly with watered-down black gel colour, allowing the colour to run off of the high points and into the low points of the waves, in order to accent the difference. For the tail, I made a little curved rope of the medium-dark green sugarpaste, and likewise painted it lighty with the black colour for uniformity. I did the same to the head as well, being careful to not get the black on the eyes. |
|
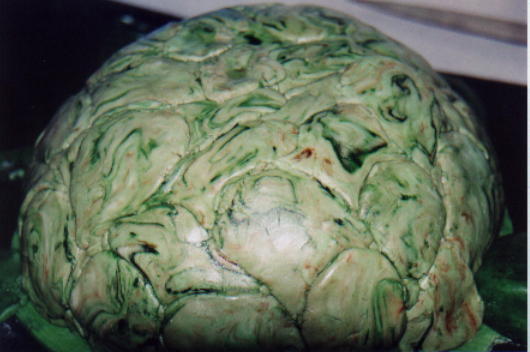
Making A'Tuin's ShellFor the shell icing, I first mixed a tiny amount of green into a portion of sugarpaste to give it a base colour of very light green. I then partially mixed in splotches of more green, plus brown. I kneaded it only until these colours were marbled in. Using this mix, I broke off chunks and one at a time, formed them into random flat shapes. I placed the shapes on the buttercreamed cake in a vaguely concentric circular pattern (starting from the bottom so upper ones would be supported and not slide down), using smaller bits to fill in any gaps. |
|
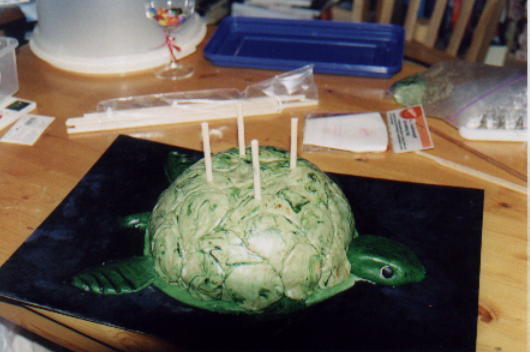
Placing the DowelsBefore the sugarpaste shell got too hard, I poked the dowels through to the cakeboard, making sure they were all the same height, and that they poked up several inches out of the shell. |
|
Making Elephant LegsUsing grey sugarpaste, I rolled out long snakes and then cut them into four equal parts. I wet the dowel and surrounding shell area with water (using a paintbrush), and then mushed the grey elephant legs around the dowel. I made sure the legs were all joined to each other as well as the dowel and the shell for maximum stability. I repeated this for all four elephants, taking care to arrange the legs so I could eventually build the elephants as though they were all walking around the shell in a circle. At this point, I left the legs to dry overnight. If I had continued without doing so, they would have sagged under the weight of the elephant bodies, and may have even caved in the turtle shell. |
|
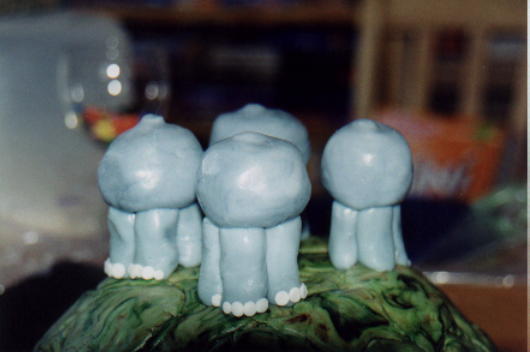
Making Elephant BodiesBy the next morning, the legs were dried hard. I made little white sugarpaste dots and placed them carefully as toes. With more of the same grey sugarpaste, I made round lumps and put them on top of the leg sets to serve as the bodies, allowing the dowels to almost, but not quite, push through the top surface. The soft sugarpaste sagged a bit, but I figured that was fine since these were supposed to be old elephants, and I occasionally gently mushed it back up as it dried to keep it from sagging too much. Had I wanted to prevent that, I could have preformed the lumps and let them partially dry on a flat surface, although that would have made it tricky to get on the dowel without cracking. I let the bodies dry for awhile, and went to the next step in the meantime. |
|
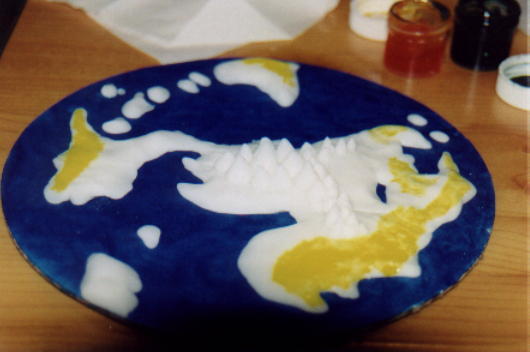
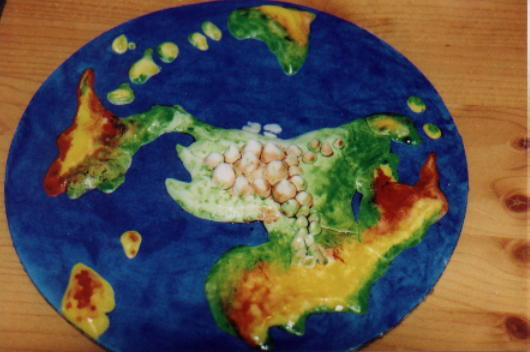
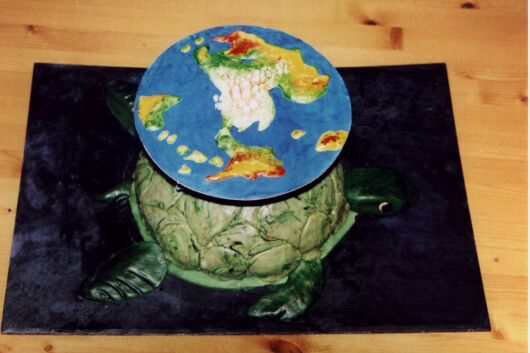
Forming the DiscworldStarting with a plain 8-inch round cake board, I painted swirls of watered-down blue colouring gel, covering the board. Then, using a map of the Discworld, I stuck blobs of white sugarpaste to the blue board in an approximation of land masses and islands. The islands were tough to stick on, since they preferred to stick to my fingers. It took some work to get them to stay on the board and not end up blue from the colouring on the board. For the mountains, I made tear-drop shapes and stuck them onto the continent sugarpaste with small dabs of water. I started with Cori Celesti, the mountain of the gods on the Hub, making it the largest and decresing the size as I spread out along the ranges from there. Then, using watered-down yellow, green, red and brown colouring gels, I painted on land colours. Where necessary, I blended the colours. I placed small drops of a brown-green mix around the bases of the mountains and let the colour work its way around, so the tips would be white (as in snowy) but the colours would penetrate through on the bases. |
|
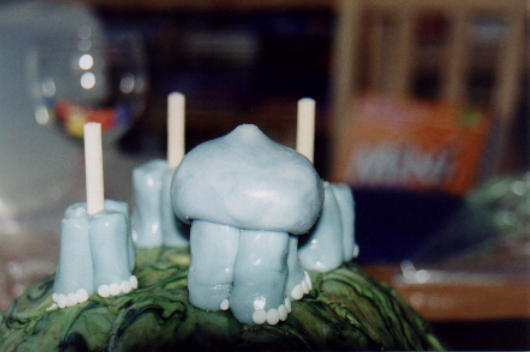
Making Elephant HeadsFirst, I stuck a toothpick into the elephant body at the point about where the chin would be, if there was one. I left about half of the toothpick sticking out. Then I used some grey sugarpaste and moulded a flat piece, pinching the outer edges on the sides to be ears, and working the middle to a dull point for the face. Using water, I stuck the soft head on the body, letting it rest on the toothpick. I used the end of the paintbrush to poke small holes for where the tusks would eventually go. The heads kept slipping down as they dried, so I had to continually work on all four of them, pushing them gently back upwards, until they finally dried and stuck in place. |
|
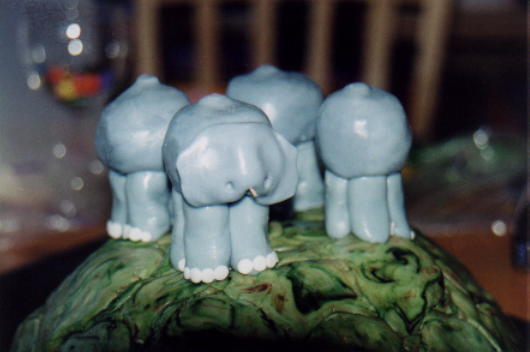
Adding Eyes, Tails, Trunks and TusksI waited for the faces to be solidly dried on before this step. Then I made some tiny tusks out of white sugarpaste and set them aside to dry. I made trunks out of the grey sugarpaste and attached them, blending with a wet paintbrush so there was no seam. I also poked nostrils into the trunks with a toothpick. In a couple of the cases, I had to temporarily stick additional toothpicks between the elephants' legs to support the trunk while it dried on. I removed these toothpicks a few hours later when I knew the trunks were solid. While the trunks and tusks were drying, I added on little tails. I made tiny black dots and stuck them on as eyes. When the tusks were solid, I gently stuck them on, poking them slightly into the holes I'd premade in the faces. I didn't force them deep in, or they would have broken. I had to hold them in place for about a minute while they dried on enough to be stable. |
|
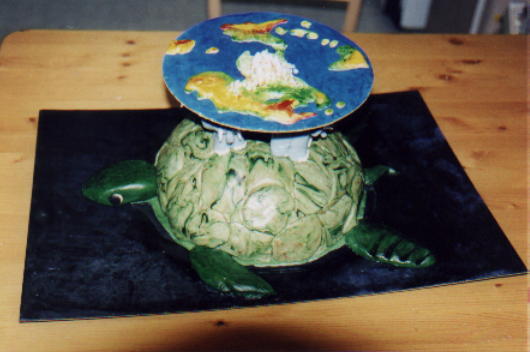
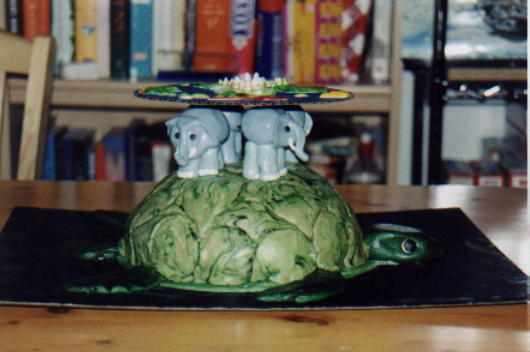
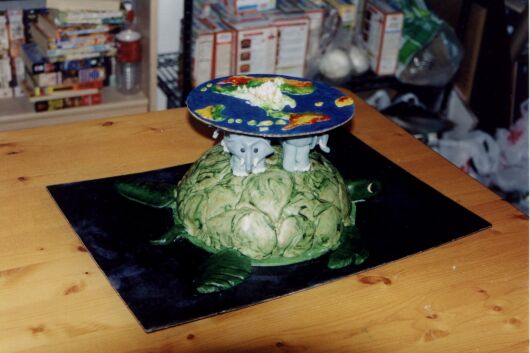
Completing the CakeOnce the elephants were finished and the extra supportive toothpicks removed (not the ones under the face, just the ones under the trunks), I dabbed some water on the elephants' backs where the dowels were almost poking through, added small gobs of grey sugarpaste, wet them, and then stuck the Discworld down on top. Tada! |
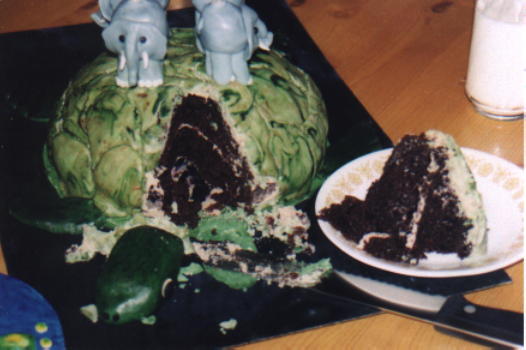
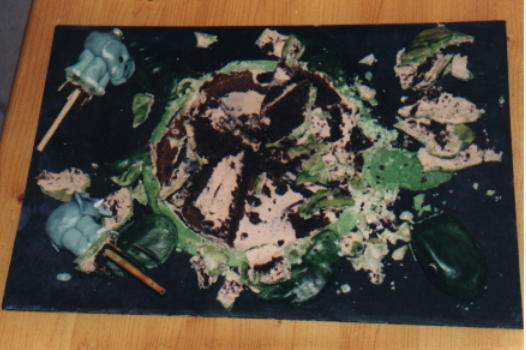
Eating the CakeJust to prove that this was indeed a real cake and was really eaten, here are some pictures of it with a slice out of it, and what it looked like after it had been completely eaten! The icing was far too sweet to eat, which is why so much of it is left on the board. |
Main Cake Page - Orc Head Tutorial - Shelob Tutorial - Gummy Tutorial - Gallery - Books - Links
Use this link to view this page with my preferred colour and font settings.
Page last updated March 7, 2010.
Email me at crafts@kimberlychapman.com
 [d] [d] |
The Ankh-Morpork WebringThis Discworld site is owned by Kimberly Chapman. |
 [d] [d]
|
If you want to receive notification of updates on any portion of this site, simply enter your email address here and click/select the button to enter. You will be required to sign up for a free Yahoo! account to complete registration. Please note that Yahoo!'s privacy policy and other management are outside of kimberlychapman.com's responsibility. Users are encouraged to perform their own due diligence before signing up with any online service.
To find out more about the list or read messages without signing up, please visit the Yahoo! page for the kimberlychapman updates mailing list.
For more information on what these tags mean, please see About KimberlyChapman.com.